Posh-SSH to automate Linux hosts using PowerShell
In this post I’m going to demonstrate a little bit of cross-platform automation using PowerShell and the PoSH-SSH module written by Carlos Perez.
Install PoSH-SSH Module
Install-Module PoSH-SSH -Force
Basics on working with PoSH-SSH Module
The PoSH-SSH Module has all mostly used capabilities of a SSH cmdline client, but for now we’re focusing on interacting with SSH sessions and executing remote command and scripts. To open a new SSH session you have to supply a credential or an SSH key pair. In this example I’m using an SSH key-pair to authenticate against an Azure VM. Generate SSH Key-pair I’m using the git bash, of course this also works with other methods.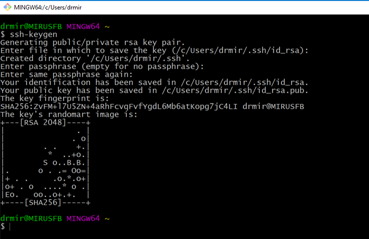 Protect the private key file..
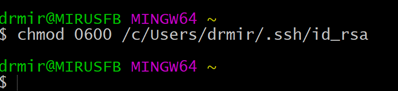 Read the public key content and copy it to clipboard
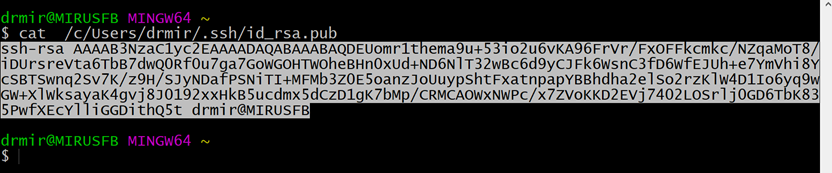 Lastly update the ssh key on the Azure VM
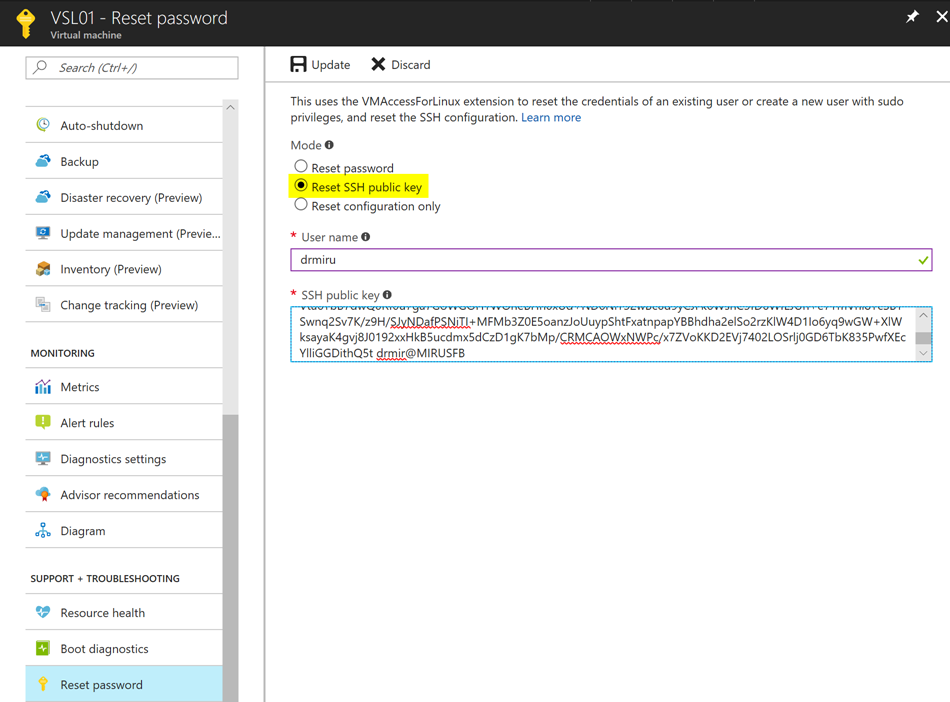
Working with SSH Sessions
Let’s construct a credential first. As we use a ssh key to authenticate, the password can be anything but an empty string.
<span style="color: #00b0f0; font-family: Consolas;">$cred = get-credential "drmiru"</span>


<span style="color: #00b0f0; font-family: Consolas;">$session = New-SSHSession –ComputerName "vsl01.westeurope.cloudapp.azure.com" –Credential $cred -KeyFile .\.ssh\id_rsa -AcceptKey
</span>
There is no way to have an interactive shell after opening a SSH session, so we have to pass remote commands into the session as we do it with PowerShell using Invoke-Command CMDLET. Also we have to ensure commands we initiate do not prompt interactively for any input or the command will timeout. For Posh-SSH the equivalent to Invoke-Command is Invoke-SSHCommand. Each command is returned with two properties
- Output [string[]]
- ExitCode [int]
Let’s do a little example. We want to list the content of the file system.
<span style="color: #00b0f0; font-family: Consolas;">(Invoke-SSHCommand -Command 'ls -la' -SSHSession $session).Output
</span>
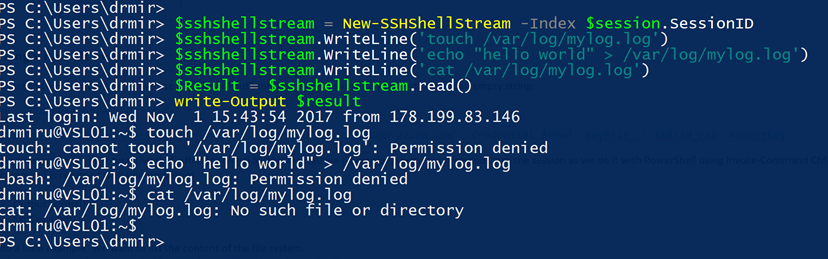
 As the command finishes on the remote system, it will print the return values from the remote command to the standard output. Another way to interact with the SSH session is to open a so called “Shell Stream”. This allows to send multiple commands, line by line. If required you can get the output line by line as well or the whole output after executing some commands in a row. Lets make a little example here. We try to write to a file (where we might not have permission with the current user).
<span style="color: #00b0f0; font-family: Consolas;">$sshshellstream = New-SSHShellStream -Index $session.SessionID</span>


<span style="color: #00b0f0; font-family: Consolas;">$sshshellstream.WriteLine('touch /var/log/mylog.log')</span>


<span style="color: #00b0f0; font-family: Consolas;">$sshshellstream.WriteLine('echo "hello world" > /var/log/mylog.log')</span>


<span style="color: #00b0f0; font-family: Consolas;">$sshshellstream.WriteLine('cat /var/log/mylog.log')</span>


<span style="color: #00b0f0; font-family: Consolas;">$Result = $sshshellstream.read()</span>


<span style="color: #00b0f0; font-family: Consolas;">write-Output $result
</span>
 Now elevating our privileges to write the file..
<span style="color: #00b0f0; font-family: Consolas;">$sshshellstream.WriteLine('sudo touch /var/log/mylog.log')</span>


<span style="color: #00b0f0; font-family: Consolas;">$sshshellstream.WriteLine('echo "hello world" > /var/log/mylog.log')</span>


<span style="color: #00b0f0; font-family: Consolas;">$sshshellstream.WriteLine('cat /var/log/mylog.log')</span>


<span style="color: #00b0f0; font-family: Consolas;">$Result = $sshshellstream.read()</span>


<span style="color: #00b0f0; font-family: Consolas;">write-Output $result
</span>
These are just a few examples what you can do with PoSH-SSH to automate stuff on Linux boxes.